Growing Potatoes
Upon Arrival
Inspect your order as soon as it arrives. Seed potatoes may not look appetizing: that’s ok! Sprouting, shriveling, wrinkles and minor blemishes are normal and will not affect the performance of your potato patch. If your seed potatoes are mushy, weeping or very moldy, please contact us at ogs@fedcoseeds.com. If you are not going to plant within two weeks, store seed in a dark cool (around 40°) fairly humid place. Do not remove growing sprouts; these are your new plants.
Chitting or Green Sprouting
You may use chitting to encourage early growth, speed development of marketable tubers, and perhaps increase yields. Warm tubers to 65° in the dark for about two weeks, then spread them out with most of the eyes facing up in a warm place (60–70°) with medium light intensity for about two weeks. This stimulates strong stubby sprouts at the bud end that are not easily broken off.
Soil Preparation
Potatoes grow in any well-drained fertile soil. Work in compost or aged manure, or try our house-blended Turbo-Tuber fertilizer, specially formulated to meet the needs of the potato plant. Incidence of scab increases with use of uncomposted manure, lime or wood ash the year of planting. Turn new ground the year before and plant with a rye/vetch cover crop. Rotate potatoes (and other Solanaceae family members: tomatoes, peppers and eggplants) with other plant families in at least a 3-year or, preferably, a 4-year rotation.
Cutting Seed
Small tubers planted whole are less sensitive to seed piece decay than cut pieces. You can cut large tubers into pieces of two ounces or more, about the size of an egg, with at least two eyes. Many varieties have eyes clustered at one end, so be sure to distribute eyes evenly when cutting. Fingerling eyes spiral the length of the tuber so you may cut them into discs or wedges. Consider treating cut seed with Myco Seed Treatment. To reduce the risk of seed piece decay, either cut and plant in one operation or condition the cut seed pieces at 55–60° and 90% humidity for 3–4 days. Covering pieces with damp burlap bags or towels is a way to maintain humidity levels.
Planting
Plant when the soil is 55–60° and dry enough to work easily, about when dandelions bloom. Planting in cooler soil slows emergence and increases the chance of seed piece decay. Planting in hot dry soil also increases the risk of seed piece decay. Plant in furrows 4–6" deep, in rows that allow for your style of hilling. Space new potatoes and fingerlings at 8" for maximum tuber set. Space later-season varieties at 10–12" for maximum size. One pound of seed will usually plant 5–8 row feet, depending on the variety; 10 pounds will usually plant 50 row feet. 2 oz. seed pieces 12" apart with 40" row spacing, requires approximately 1600 lbs. (or 1000 lbs. fingerlings) per acre.
Cultivation and Hilling
Cultivate shallowly as needed during early growth. Hill when plants reach 6" and again at 12–15". After the second hilling, plants will shade and outcompete weeds. Don’t cover plants completely when hilling. Be gentle so as not to damage the roots. Hilling gives the plants room to develop potatoes between the seed piece and the soil surface; it also warms the roots, stimulating growth. Mulching plants after the second hilling helps to retain soil moisture, control weeds and reduce incidence of sunburn.
Irrigation
Potato plants are sensitive to small changes in soil moisture because of their shallow (12–15") root systems. Tuber yield and size are directly related to the amount of water available during two critical growth stages: tuber initiation and tuber bulking. Tuber initiation is a 10–14 day period when tubers form at stolon tips. For most varieties, the end of this stage coincides with early flowering. Tuber bulking follows and continues until plants are mature. Lack of water tends to increase incidence and severity of scab, and will affect yield and overall size of the potatoes. Inconsistent water may cause growth cracks, hollow heart and second growth. Ensure 1" of water weekly from plant emergence until two weeks before harvest.

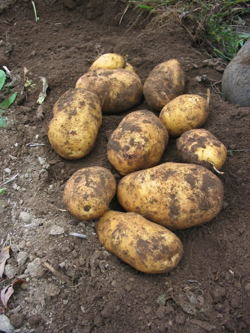
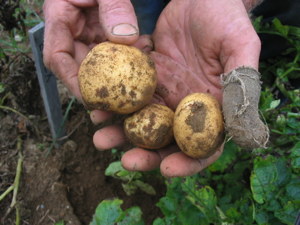
Harvest and Storage
Early harvest or “robbing the plant” can be done anytime you can find potatoes, approximately 60 days after planting or 30 days after flowering. These are new potatoes to be eaten; they will not store well.
Potato plants are mature when the vines start to senesce, or die back and fall over. You may cut, mow, flame-kill or allow them to die naturally. Leave tubers in the ground for 14–21 days after the vines are dead before digging to give the skin time to “set,” and to prevent transmission of blight spores from foliage to tubers. Harvest in cool dry weather if possible. After a brief drying, out of direct sunlight, lightly brush off excess dirt but don’t wash potatoes intended for storage. Hold at 55–60° for several weeks to allow harvest injuries and bruising to heal; then store only sound tubers at 38–40° with 85–90% relative humidity in complete darkness.
Yields
An average yield is 10 pounds harvested to 1 pound planted (10:1). Less than 6:1 probably indicates a problem, likely caused by low fertility, lack of water, or excessive disease or insect pressure. Yields as high as 20:1 are exceptional, but can be achieved.
Growing Potatoes in Containers
Yes, you can grow potatoes in containers! Yields will not be as high as potatoes planted in the ground, but if a bucket is all you have, plant a potato!
We recommend 20-gallon fabric pots, but you can also use a 5-gallon bucket with drainage holes drilled in the bottom. Each potato plant wants about 5 gallons to grow in, so you can plant 4 seed potatoes per 20-gallon pot (spaced 6" from pot edges), or one seed potato per bucket.
Before planting, chit (green sprout) your seed potatoes. When sprouts appear, leave the seed whole (don’t cut it) and rub off all but the largest 2 or 3 sprouts. If you want smaller potatoes, leave all the sprouts.
In your containers, set seed potatoes into 3" of moist balanced compost, like Coast of Maine Quoddy Blend or Vermont Compost Plus. You can mix the compost with garden soil to save money, but compost is best because it stays loose and moist. You can also add a small handful of Turbo-Tuber, but don’t overdo it.
Cover potatoes with 12–16" of compost or soil, leaving 3–4" of space at the top of the container. Once sprouts emerge, mulch with hay or straw to keep any high-setting tubers from turning green.
Set containers in full sun, but avoid really hot locations. Water deeply a couple times a week, but make sure the soil doesn’t stay soggy. Harvest 2 weeks after plants turn yellow and wither.
Consider our Container Collection, or go with one of these:
If you try other varieties, let us know which ones work best for you!