Fedco’s Guide to Growing Great Garlic Greener
The recommendations below are for a 100 square foot bed, planted with approximately 2 lb of garlic seed.
Fedco’s 5G Grow Great Garlic Greener, Guaranteed Kit includes:5 lb of Fedco’s 3G Greener Garlic Grower (for mixing into the soil at planting time)
8 white wooden garden stakes (for row-marking and identifying varieties)
2 lb of blood meal (for two nitrogen-rich side-dressings in the spring)
2 lb organic forage oats seed (to restore the soil and provide a mat of organic matter for the winter)
4 mesh produce bags (for storing the harvest)
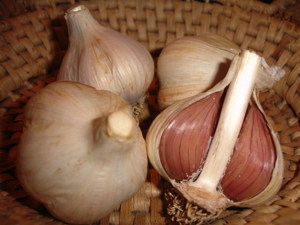
In late fall, 3–4 weeks before the ground freezes, prepare a nitrogen-rich well-groomed seedbed, incorporating the 5 lb bag of 3G Greener Garlic Grower. Separate the cloves and plant each one 3 inches deep, pointed side up, 6" between cloves within each row, and 12" between rows, leaving a 6" shoulder along the sides of the bed. Mulch with 4–6" of straw, leaves, or hay. Mark the end of each row with a white wooden garden stake.
When garlic plants emerge in the spring—usually early to mid-April here in Maine—spread one of the 1 lb bags of blood meal evenly over the surface of your garlic bed. Some plants may struggle to emerge through the mulch. If you notice any gaps in your rows, look beneath the mulch for young plants and make openings as needed.
Two to three weeks later, pull the mulch off and apply the second 1 lb bag of blood meal directly to the soil surface. Use your favorite weeding tool—stirrup hoes work well—to incorporate the blood meal and knock back early weeds. Replace the mulch. This will be enough nutrients to carry your crop to maturity. Avoid applying any nutrients beyond early May, as this will encourage excess leaf growth and reduce bulb size. This procedure, minus the fertilization, can be repeated again in June or later if the weeds are mocking your mulch and threatening to get ahead of the garlic.
Through spring and early summer, pay attention to rainfall, and water the garlic beds if you’re not seeing an average of 1" of rainfall per week.
In midsummer, the scapes of hardneck garlic will begin to unfurl. Cut the scapes at their base to improve bulb size and then use them in your kitchen as you would garlic cloves. Or try steeping them outside in a bucket of water for a week to make a natural insect repellent for the garden or orchard.
You’ll know you’re approaching harvest time when the lower 2–3 leaves turn brown, typically late July in central Maine. Avoid watering the garlic past this point.
Once the plants are down to having 4 or 5 leaves that are still primarily green, and before cloves begin to separate, harvest the garlic by loosening the soil with a garden fork and gently lifting the entire plant. Rub or brush off the bulk of the soil clinging to the roots/head. Handle bulbs with care to prevent bruising and maximize storage potential.
Tie plants into small bundles and hang to cure in a well-ventilated place, protected from sun and rain, until dry. Beware of curing in greenhouses, as temperatures above 90°F can spoil the garlic. Do not field-cure.
While your garlic is curing, pull the mulch off the former garlic bed, rake the soil smooth, remove any weeds, and broadcast the forage oats evenly. Rake the oat seed into the soil and re-apply a thin layer of the mulch that was set aside.
Once the garlic has cured (after about 3-4 weeks), it is time to prepare the garlic for storage. Trim the roots close to the bulb and cut the tops off, to within 1" of the bulb. Rub off loose skins and any dried dirt. Finally, store your garlic in a cool, dry place (about 60°F, 50% relative humidity) using the mesh bags provided.
Enjoy your homegrown garlic!
Note
Fedco Bulbs requires our growers and suppliers to test each lot of garlic for garlic bloat nematode and white rot using reputable independent labs.